
Understanding the Self-Clean Feature
What is the Self-Clean Feature?
The self-clean feature on a GE oven uses high heat to decompose food residue into ash, eliminating the need for harsh chemicals. It reaches 880°F, saving time and effort while being eco-friendly with less water usage.
- It turns food debris into ash, which can be wiped away after cooling.
- This feature is a hands-off, efficient cleaning solution for busy households.
The self-clean feature on a GE oven is a convenient, hands-off cleaning option that uses high heat to break down food residue into ash. During the cycle, the oven reaches extremely high temperatures (up to 880°F), effectively decomposing tough stains and grime. This process eliminates the need for harsh chemicals, making it an eco-friendly and time-saving solution. Once the cycle is complete, the ash can be easily wiped away with a damp cloth. This feature is ideal for deep cleaning and maintaining your oven’s interior without scrubbing, ensuring it remains in pristine condition with minimal effort.
- It uses high heat to decompose food residue.
- The process is chemical-free and eco-friendly.
- It saves time and effort compared to manual cleaning.
How High Heat Cleaning Works
The self-clean feature uses high heat to break down food residue into ash. During the cycle, the oven reaches temperatures of up to 880°F (471°C), far exceeding normal cooking temperatures. This intense heat decomposes tough stains and grime, leaving behind a fine ash that can be easily wiped away. The process is completed in about 2 hours, after which the oven cools down, allowing for safe cleaning. This method is efficient and avoids the need for harsh chemicals, making it a convenient option for deep cleaning your oven.
- High heat decomposes food residue into ash.
- Temperatures reach up to 880°F during the cycle.
- The process takes approximately 2 hours to complete.
Safety Precautions During the Self-Clean Cycle
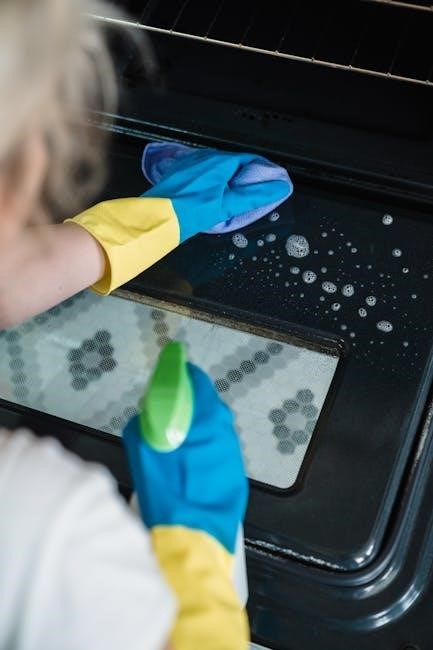
Ensure proper ventilation by opening windows or using an exhaust fan to prevent fumes from accumulating. Keep children and pets away, as the oven’s exterior may become hot. Avoid using cleaning products before the cycle, as they can release harmful fumes. Never open the oven door during the cycle, as high heat can cause burns. Always ensure the oven door is locked and remains closed until the cycle is complete and the oven has cooled. Keep flammable materials away from the oven during cleaning. Stay in the kitchen to monitor the process and address any issues promptly.
- Ensure good ventilation to prevent fume buildup.
- Keep children and pets away from the hot oven surfaces.
- Avoid opening the oven door during the cleaning cycle.
Preparing Your GE Oven for Cleaning
Before initiating the self-clean cycle, remove racks, trays, and large food debris. Wipe spills with a damp cloth and ensure the kitchen is well-ventilated to prevent fumes.
- Remove racks and trays to prevent warping.
- Clear large debris for effective cleaning.
- Ensure proper ventilation to avoid fume buildup.
Removing Racks and Trays
Before starting the self-clean cycle, remove all racks and trays from your GE oven to prevent warping or damage from high heat. Check if your racks are self-cleaning safe; if unsure, take them out. Soak racks in warm, soapy water or scrub with a non-abrasive sponge. For tough stains, apply a baking soda paste and let it sit before wiping clean. This ensures racks remain in good condition and simplifies the cleaning process. Regularly cleaning racks prevents grease buildup and maintains your oven’s efficiency.
- Remove racks and trays to avoid damage during high heat.
- Soak racks in warm, soapy water for easy cleaning.
- Use baking soda for stubborn stains on racks.
Handling Large Food Debris
Before initiating the self-clean cycle, remove large food debris from the oven floor to ensure efficient cleaning. Use a paper towel or soft cloth to wipe away loose particles. For stubborn pieces, gently scrub with a non-abrasive sponge or a damp cloth. Avoid using abrasive cleaners or harsh chemicals, as they can damage the oven’s interior. Failure to remove large debris may result in lingering odors or smoke during the high-heat cycle. This step ensures the self-clean process works effectively and prevents potential issues during cleaning.
- Remove large food particles to avoid smoke and odors.
- Use a soft cloth or non-abrasive tool for stubborn debris.
- Avoid harsh chemicals to protect the oven’s surface.
Protecting Your Kitchen from Fumes and Heat
During the self-clean cycle, your GE oven generates intense heat and fumes, requiring proper precautions to protect your kitchen. Open windows or turn on an exhaust fan to ventilate the area and reduce fume accumulation. Keep children and pets away, as the oven’s exterior becomes extremely hot. Ensure no flammable materials, like towels or curtains, are near the oven. If fumes become overwhelming, temporarily turn off the oven and allow it to cool slightly before restarting. Proper ventilation and safety measures ensure a safe and effective cleaning process.
- Open windows or use an exhaust fan for ventilation.
- Keep children and pets away from the oven.
- Remove flammable items from the vicinity.
Initiating the Self-Clean Cycle
Press the self-clean button, typically marked with a padlock symbol, to start the cycle. Select the desired cleaning time or let the oven default to its standard duration, usually around 2-3 hours. Once started, the oven locks and heats to high temperatures to incinerate food residue.
- Locate and press the self-clean button.
- Select the cleaning duration or use the default setting.
- The oven locks and begins the high-heat cycle.
Locating the Self-Clean Button
The self-clean button is typically located on the control panel of your GE oven. It is often labeled as “Self Clean” or marked with a padlock symbol. Depending on the model, it may be positioned alongside other function buttons, such as bake or broil. To find it, look for a button with a lock icon or the words “Self Clean” printed above or below it. If you’re unsure, consult your oven’s user manual for specific guidance, as the exact location can vary slightly between models. Once identified, pressing this button will activate the self-cleaning cycle.
Setting Up the Cycle
To set up the self-clean cycle, press the Self-Clean button on your GE oven’s control panel. Use the + or — buttons to select the desired cleaning time, typically 2-4 hours. Once selected, press Start to begin the cycle. Ensure the oven door is closed and the racks are removed. The oven will lock automatically during the cycle to ensure safety. The oven will heat to a high temperature, decomposing food residue into ash. Avoid opening the door during the cycle, as it will remain locked until the process is complete. Let the oven cool before wiping away the ash with a damp cloth.
Duration of the Cleaning Process
The self-clean cycle on a GE oven typically lasts 2 to 4 hours, depending on the level of soil inside the oven. The oven locks during this time and cannot be opened until the cycle is complete and the oven has cooled slightly. Once the cycle finishes, allow the oven to cool down before wiping away the ash with a damp cloth. For lighter cleaning needs, the steam clean option is available, lasting about 30 minutes. This shorter cycle is ideal for maintaining the oven’s cleanliness without the prolonged high heat of the traditional self-clean feature. Always wait for the oven to cool before cleaning.
Alternative Cleaning Methods
For lighter cleaning, GE ovens offer a steam clean option using water, while manual cleaning with baking soda and water is effective for tough stains.
Steam Cleaning Option
The steam cleaning option on GE ovens provides a gentle and efficient way to maintain your oven without extreme heat. Pour one cup of water into the oven bottom, close the door, and select the steam function. The cycle lasts about 30 minutes, loosening food residue and grime. This method is ideal for lighter messes and avoids the intense temperatures of the self-clean cycle. Racks and trays can remain inside during steam cleaning. After the cycle, wipe the interior with a damp cloth to remove loosened debris. It’s a convenient option for quick, low-odor cleaning without harsh chemicals or prolonged heat exposure.
Manual Cleaning with Baking Soda and Water
For a chemical-free cleaning option, use a baking soda and water paste to tackle tough stains in your GE oven. Mix 1 tablespoon of baking soda with 2 tablespoons of water to form a thick paste. Apply it directly to stubborn stains and grime using a soft brush or sponge. Let it sit for 2-3 hours or overnight for best results. After soaking, wipe away the paste and loosened debris with a damp cloth. For extra-tough spots, repeat the process or use a non-abrasive scrubber. This eco-friendly method is gentle on surfaces and effective for deep cleaning without harsh chemicals.

Maintenance and Upkeep
Regularly wiping spills and cleaning racks ensures your GE oven stays efficient and hygienic. Avoid harsh chemicals to preserve the finish and maintain optimal performance over time.
Regular Cleaning Tips
Regular cleaning helps maintain your GE oven’s performance and appearance. Wipe down surfaces after each use to prevent food buildup. For tough spills, let the oven cool, then scrub with a gentle cleanser and a non-abrasive sponge. Clean racks by soaking them in soapy water or placing them in the oven during the self-clean cycle. Check for debris before cooking to avoid smoke and odors. For lighter cleaning, use a damp cloth to wipe surfaces while the oven is still warm. Avoid harsh chemicals, as they can damage finishes. Regular upkeep ensures your oven remains efficient and hygienic for years.
Cleaning the Oven Exterior
Cleaning the exterior of your GE oven is essential for maintaining its appearance. Use a soft cloth and mild detergent to wipe down surfaces, avoiding harsh chemicals that might scratch the finish. For glass surfaces, apply a ceramic cooktop cleanser and buff with a lint-free cloth for a streak-free shine. Avoid abrasive sponges or scrubbers, as they can damage the exterior. Regular wiping prevents grease buildup and keeps the oven looking new. For tougher stains, mix baking soda and water into a paste, apply it, and let it sit before wiping clean. This gentle approach ensures the exterior remains pristine without damage.
Deep Cleaning for Tough Stains
For deep cleaning tough stains, apply a paste made from baking soda and water directly to the stained areas. Let it sit for several hours or overnight before scrubbing with a non-abrasive sponge or brush; For stubborn spots, use a steam cleaning option by pouring water into the oven bottom, then running a steam cycle. This loosens grime without extreme heat. After cleaning, wipe away residue with a damp cloth. Avoid harsh chemicals, as they can damage the oven’s finish. Regular deep cleaning prevents stains from building up, keeping your oven in excellent condition and ensuring optimal performance.

Common Issues and Solutions
Common issues with GE oven cleaning include lingering odors after the self-clean cycle and the feature not working. For odors, ensure proper ventilation and use a mild air freshener. If the self-clean feature fails, check button functionality and ensure the door is locked properly during the cycle. Regular maintenance and following manufacturer guidelines can prevent these issues. Always refer to the user manual for specific troubleshooting steps. Addressing these problems promptly ensures your oven remains efficient and hygienic for long-term use.
Why the Self-Clean Feature May Not Work
The self-clean feature may fail due to issues like a malfunctioning control panel or faulty sensors. If the oven door isn’t properly locked, the cycle won’t start. Power interruptions or a blown fuse can also prevent activation. Additionally, a faulty temperature sensor or door lock mechanism can disable the feature. Ensure the oven is preheated and all buttons are functioning correctly. If problems persist, consult the user manual or contact a professional for repair. Regular maintenance and adhering to manufacturer guidelines can help avoid such issues. Always verify the oven’s electrical connections and settings before initiating the self-clean cycle.
Dealing with Lingering Odors After Cleaning
Lingering odors after using the self-clean feature on your GE oven can occur due to residual ash or food particles. To eliminate these smells, leave the oven door open after the cycle to allow it to cool and ventilate. Wipe the interior with a damp cloth to remove any remaining ash. For persistent odors, mix equal parts water and white vinegar in a heat-safe bowl, place it inside, and run a low-temperature cycle for 30 minutes. This natural method helps neutralize odors without harsh chemicals. Ensure all food debris is removed before cleaning to prevent lingering smells. Regular cleaning also helps reduce odor buildup.

Additional Tips
Always use a microfiber cloth to wipe surfaces for streak-free results. Avoid abrasive cleaners to prevent scratching. Regularly check oven racks for food residue and clean them promptly. For tough stains, apply a baking soda paste and let it sit overnight before scrubbing. This ensures a sparkling clean oven with minimal effort.
Cleaning Oven Racks and Trays
Remove racks and trays from the oven and soak them in warm, soapy water. Use a non-abrasive sponge or brush to scrub away grease. For tough stains, apply a baking soda paste, let it sit, then wipe clean. Rinse thoroughly and dry before reinstalling. This method ensures racks and trays are sparkling clean and ready for use.
DIY Cleaning Solutions
For a gentle and effective clean, try DIY solutions. Mix water and baking soda to create a paste, apply it to interior surfaces, and let it sit overnight. Wipe clean with a damp cloth. For tougher stains, soak racks in warm soapy water or use a steam cleaning option by pouring water into the oven and running a steam cycle. These methods avoid harsh chemicals and are eco-friendly, ensuring your oven stays clean without damaging surfaces. Always ventilate your kitchen and avoid using abrasive materials to maintain your oven’s condition.
Final Inspection and Touch-ups
After completing the self-clean or manual cleaning process, inspect your GE oven for any remaining residue. Use a damp cloth to wipe away ash or streaks. Check racks and trays to ensure they are spotless and properly aligned. For any missed spots, apply a small amount of baking soda paste and let it sit before wiping clean. Ensure the oven door and exterior are streak-free by using a mild detergent and soft cloth. Finally, turn on the oven light to verify all areas are clean and shiny. This thorough inspection ensures your oven is pristine and ready for its next use.